Monday, June 18, 2012

3-Cheese Cordon Bleu Pasta ~~~ WHAT?!

Hey Hey Hey Fellow Bloggers!!! It's me, MommyBee :) Hope you all are in good spirits today! I know I am! So since lifes good (for the moment at least)---- and while I'm in such a good mood, I thought that I would share with you a delicious new recipe! (I'm really not trying to turn this into a food blog---promise) See, the thing is, when G is not here, I really don't cook all that much. Me, M, and A are pretty content with the occasional take-out, frozen pizza, hamburger helper, or ramen noodles. <<<<this may not make a whole lot of sense, because those of you that know me, know that I LOVE to cook>>>>  But I guess I just feel like, when G's not here theres really no point in making a big, wonderful dish for dinner because the truth is M and A could really care less. Sooooo anyways- I'm rambling---- back to the point. Since G is home for the time being, I thought tonight would be a good night to make one of his favorites, 3 Cheese Cordon Bleu Pasta. I have to admit, the concept of Condon Bleu Pasta was not entirely original, (the original idea came from here ) but I feel like I've tweaked it enough to be my own. So here goes----

3-Cheese Chicken Cordon Bleu Pasta

What you'll need:

- 1 lb. pasta (any shape, just not spagetti or fettucini)
- 1 to 1 1/2 cups Provel, shredded or in strings
- 1 8oz brick Swiss Cheese, shredded
- 1 8oz package Cream Cheese, softened
- 1/2 cup Butter
- 1 1/2 cups Milk
- 1 cup Panko Bread Crumbs
- 1 8oz package Diced Ham
- 1 1/2 to 2 cups Chicken, cooked and cubed
- Salt
- Pepper
- Cayene Pepper
-So, first things first --- you're going to want to cook and cube your chicken
-Then, cook your pasta (make sure to add plenty of salt and a bit of oil to the water)
-Once your pasta is cooked to an al dente firmness, drain, and return it to the pot
-Then, add in the cooked, cubed ham and the cooked, cubed chicken
It will look a little something like this:
-Now it's time to start pre-heating the broiler
-In a medium sized saucepan combine the milk and cream cheese (it's really important that your cream cheese is softened for this)
-Cook this over low/medium heat, stirring frequently, until it becomes smooth
-Once the texture reaches a smooth consistency, add it to the pasta/chicken/ham mixture
-Then, stir in the provel, the swiss cheese, cayene pepper, salt, and pepper
It will look a little something like this:
-Mix everything together until the cheese is melted and then throw it all into a baking pan
-Top with the Panko crumbs, and pour the melted butter over the top
-Place the dish in the oven and broil until the top is browned (about 4 minutes)
This is the dish:
Yummmmmmmmmmmmmmmmmmmmmmmmmmmmmmmmmmmmmmmmmmmmmmmmmm
This is soooooooo good and sooooooooo easy!!! I hope you all like it!!

Saturday, June 9, 2012

Graduation Gifts ~

Hey there bloggers! MommyBee here!! Sorry it's taken so long to get back to my blog- things have been pretty nutt-so around here as of late. Here's an update-- G has been in Kansas on work since Tuesday, M is finally do with school, I'm finally done with school, and A is well, fine. Since M and A's birthday party, I've immersed myself in yet another project. My baby sis, B, just graduated from highschool!! Sooo, since I'm not really involved in the planning of the party, I've put all my energy and focus into the gifts. I know, I know, new grads--- they all want money. Buuuttt, I'm not a 'give money for a gift' type of person. I'd rather give something a little more personal, you know? Sooooo, I decided to make her a graduation scrapbook. (You may not know this, but I'm something of a scrapbooking genius). Here's the first page:
Ok, Ok, so let me be the first to say, this picture ^^^ does not do it (or me) any justice. You'll just have to trust me ---- it's WAY cute!!! And I'm sooooooo excited to give it to her!! Then, M and A wanted to get her something especially from them, so we decided to go with cheap & yummy --- cookies! We bought a zebra striped box from Hobby Lobby and then prined out a label for it that says: 'Congratulations Aunt B! You're One Smart Cookie!' It lookes like this:
That would've been enough--- if I was a normal human being --- but we all know, I'm not. So we also put together these really cute 'Exam Cram Baskets' (one for B and one for her boyfriend, who also graduated this year) They look like this:
I just bought a 3$ basket from Walmart and filled it up with all kinds of 'exam-ish' things. I put a notebook, pens, pencils, hylighters, 2 bottles of Jones soda, notecards, sticky post-its, ibuprofen, a reusable coffe cup, and some snacks. The super cute 'Exam Cram Survival Kit' printable came from 
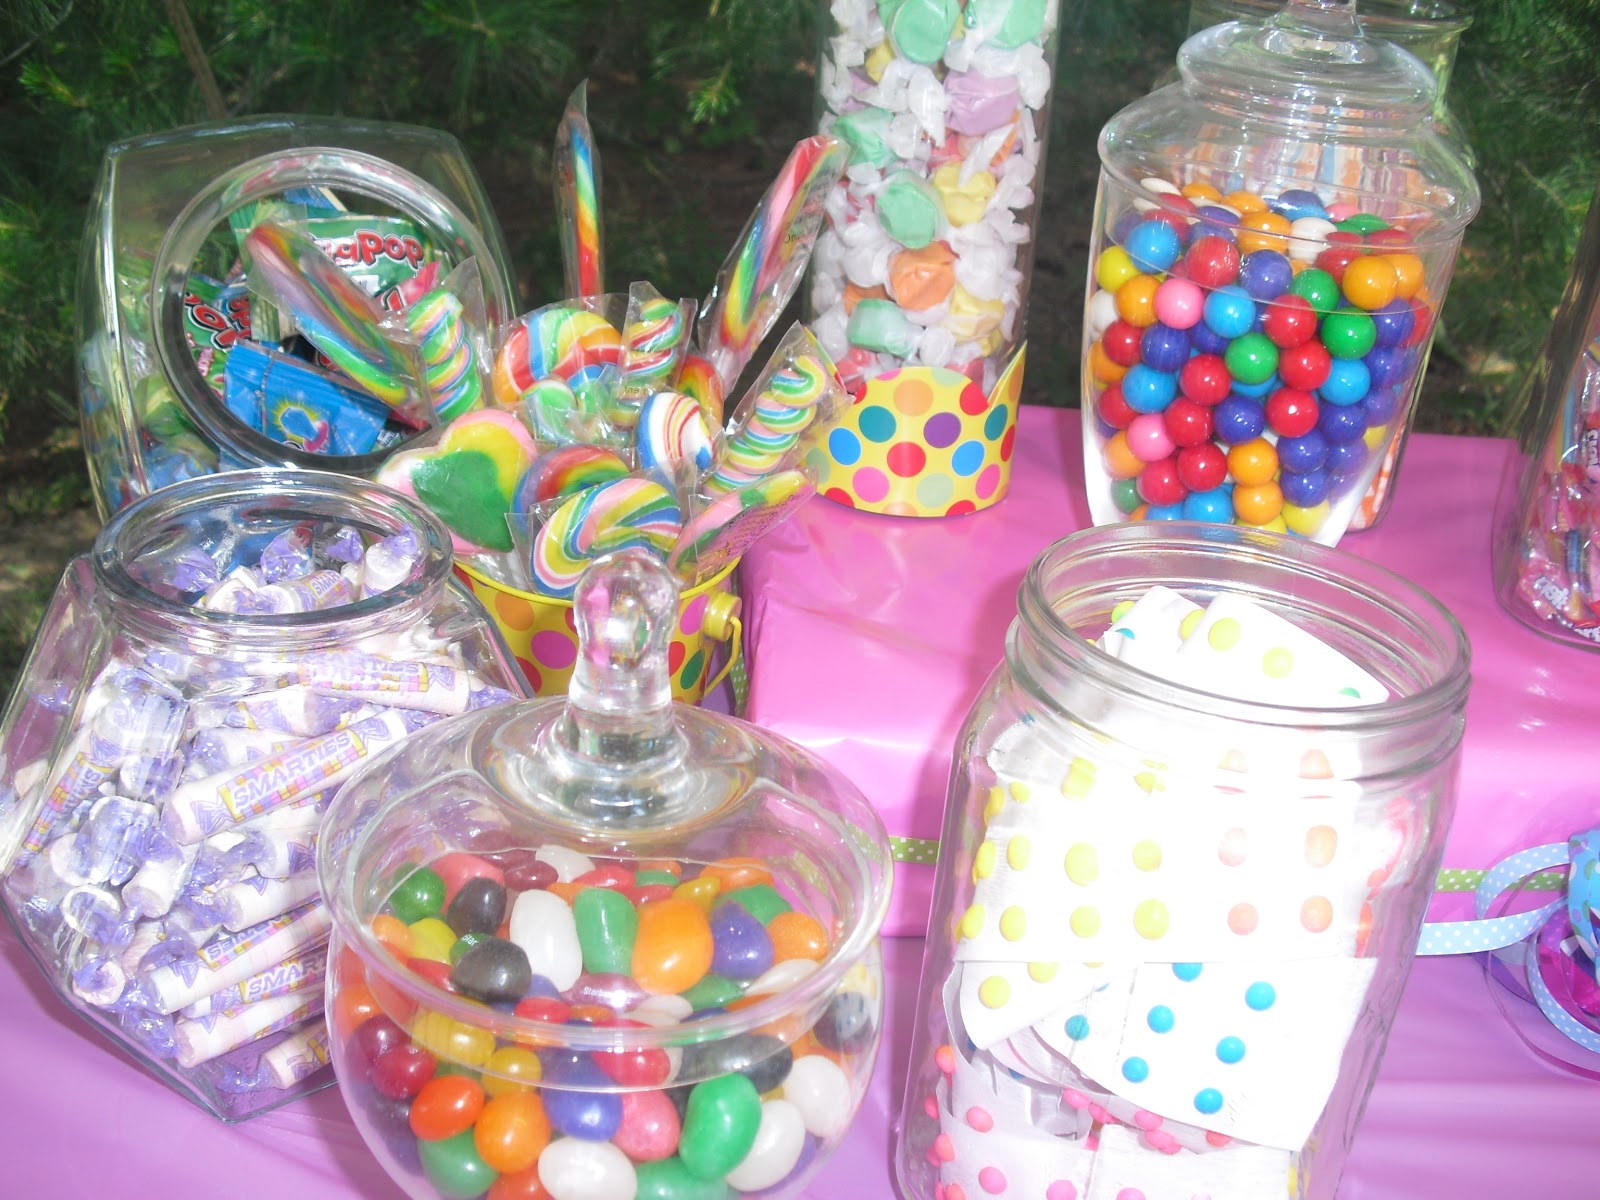
here. <<< (She also has tons of other gift basket ideas). And finally, we put together two candy boxes (one for each of the grads). This is what it looks like without the poem attached:
This idea came from several different sources, and I ended up just making my own poem (pulling from different ideas here and there) This is how the poem reads:
'Look at you Smartie pants! We're so proud of your aMazing accomplishment! You've studies Extra hard and earned that--- Whatchamacallit? Oh, yeah, diploma. Don't listen to Snickers that you are a DumDum or Nerd. Because you are one Hot Tamale in this Milky Way!! You are on your way to making 100 Grand. Now I know that it has been a Rocky Road with Mounds and Sour Patch's along the way--- But you have proven that you're not an Airhead, and now you've reached the ultimate Payday. Don't Rolover thinking you're some Red Hot Big Hunk that can live off of a Sugar Daddy. Just Take Five and enjoy your Fast Break of summer. Soon enough you'll have to hit the books and Scor high on those exams because it is up to you wether or not you succeed. There are Good N Plenty times ahead and remember, if you ever need a lifesaver you can count on us. Congratualtions Sweetart!! Hugs and Kisses! We love you to Pieces!! ~ Love, MommyBee, G, M, and A'
Cute right?? You see, everything that's underlined is in the box--- it's all candy!!! When I saw all the different interpretations of this gift idea I knew that I had to do this :)
Well, I suppose thats about it on graduation gifts ---  Until next time, bloggers
xoxoMommyBeexoxo

Sunday, June 3, 2012

Sweet Shoppe Party Games, Etc....

Hey Hey Hey!!! Hope this blog is reaching you all in good spirits :) This is MommyBee of course & today will be my final blog on M and A's Sweet Shoppe Party. Bitter-Sweet, I know. But anyway, as promised today will be mostly about the games and some other fun misc. stuff. So, without further ado - Heeerrrreeee we go!
Let's start with the games.This is a picture of the table next to the candy buffet.
This table was mostly for Misc. items that I didn't really know where else to put ^^^ We had birthday hats, bubbles, the DumDum tree (don't worry, I have the tutorial on here, just keep scrolling), and a basket filled with swirly pops. This was also where we put the 'Guess the Gumdrops' game. This was really easy to put together & everyone seems to like it for the most part. That green basket held everything we needed for our 'Peppermint Races'. I (unfortunately) didn't get any pictures of the game but let me try & explain how it works. Okay, so basically you line all the kids (and adults) up. You ask them what level of hardness do they want (level 1- spoon, level 2- fork, and level 3- knife). Give them their silverware, place a peppermint on it & whoever reaches the finish line with their peppermint first wins! This was a well liked game.We also did a 'Licorice Competition'. For this game, I had all the kids (and adults) place their hands behind their back. Then, I placed a piece of licorice in each of their mouths. The object of the game was to see who could finish their piece first witout using their hands. We also had a cupcake shaped pinata (which I did get a picture of)

That's M getting ready to swing :) & of course, EVERYONE loved the pinata. We also did a 'Pin the Cherry on the Cupcake' game--- & if I do say do myself, it was super duper cute!!! Here are the pics:

See?? I told you! SuperDuperCute!!! This was soooo simple to make & everyone just thought it was adorable :) It was so easy to make to! Just some big, colorful poster board from the dollar store, tape, and glue. & I think that's about all we did for the games that day. Okay, now, what you've been waiting for --- the DumDum Tree.
Ahhhh!  I just love this! So, basically all you need is A LOT of Dum Dum suckers, a styrafoam ball, a styrafoam block, a doll rod, a pail or bucket, and then something to cover the styrafoam block (we used jelly beans). A word of caution though --- as easy as this is, you can still screw it up!!! (believe me, I know) Be careful of the size of the styrafoam ball that you get--- bigger is not always better. This thing gets suuuuper heavy with all those suckers in it, and you don't want it getting knocked over. That was our biggest issue, it was just so top heavy that it was hard to keep standing (we eventually put rocks in the bottom of the pail to keep it steady. Well, I suppose that's about it for the Sweet Shoppe Party. We covered the candy buffet, the food, the cake & ice cream, the games, and the decorations. If I left anything out that you really need to know, feel free to ask :) In the mean-time, I'm going to get started on my sister, B's, graduation party!!! (details soon to come :)

Thursday, May 24, 2012

cAkE & iCe CrEaM!

Hey there fellow bloggers!! I told you'd I'd be back :) And man, oh, man, I'm fast too! LOL --- Two posts in two days (shows you just how bored I am!- Yes, you guessed it, G is out of town on business) Well, lets get to it then. I told you I'd be back with more party details & here I am. I think we'll do the cake & ice cream for this one. Yes, you read that right. We had a CAKE, ICE CREAM, and a CANDY BUFFET!!! (Let me tell you, the parents were hating me that day) Anywho--- here we are with the cake
Cute right?? Anyway, not bad for a couple of amatures LOL (Well my friend T has been at Johnson and Wales University for the past year speacializing in pastrys, so shes not a total amature) In fact, T did almost everything for the cake.
 We wanted something overly colorful and topsy turvy. I just think it turned out great. The way that it looks does not reflect the amount of time and energy that went into it - Believe Me!! Needless to say, I will not be giving a tutorial on how to make this (it was just to dang difficult) But what I will be giving a tutorial on is the ice cream. No, no, no, not how to make ice cream ---- how to serve ice cream. How to serve a lot of ice cream that fastest and most simple way ever. Believe me, this is a time saver!! Let's start with a couple of pics ~
First things first, get out your muffin tins and add some cupcake liners (colorful ones :)
 Now, get to scooping! 1 scoop per liner should be plenty- and you may have to dip your scooper in some warm water a couple times to get nice and round scoops
And finally, you'll end up with something like this ^^^^ After you've gotten as many scoops as you want, just stick the muffin tins in the freezer to let the ice cream balls harden. Then, when your ready to serve cake and ice cream, just grab the tins from the freezer and let everyone grab one. This is such a timesaver!! Believe me, it beats standing there scooping out individual servings for each person!  And if you're looking to impress everyone on how creative you are, this is the idea your looking for! Well, I suppose thats about it for now bloggers, more details later!!!
xoxoMommyBeexoxo

Wednesday, May 23, 2012

Sweet Shoppe Party Details!! (Food)

Hey, Hey, Hey, Hey There Everyone!!! MommyBee here as always :) Well, as I promised, here are more Sweet Shoppe Party details! Yay! I decided that this post should be mostly about the food that was served. So, without further delay, here you are ----


See my Oh-So-Bright-&-Beautiful Deviled Eggs??!! Pretty awesome right?! (Don't worry, I'll be a giving a tutorial shortly, just keep scrolling)

 So, basically, we wanted something simple, but yummy. Something that could be done ahead of time, but taste like it was fresh made. So we decided on Pulled Pork (not just any pulled pork--- the easiest, most delicious pulled pork you'll ever taste), Hot Dogs (the stand-by, I know, but we did ours in our crock-pot-- bet you didn't see that coming), My Oh-So-Bright-&-Beautiful Deviled Eggs (like I said, the tutorial is coming), Bacon Ranch Pasta Salad (thank you Betty Crocker--- c'mon, I can't do everything), and Creamy Mustard Potato Salad (courtesy of my father-in-law). So, I'll get to all the wonderful recipes in a second, but first things first, if you're going to have wonderful food, you need to have wonderful place settings (and in our case, we needed wonderfully colorful place settings) ~ here's a peak at what we did~~
Cute right? We alternated between green and pink dinner plates, and green and pink dessert plates, and green and pink napkins (that I got in the clearance isle in Walmart for 99 cents- go me!)
Here's a closer look at the silverware--- we had orange forks and yellow spoons (the silverware came from Party City and the cute polka-dot pails I found in the clearance isle at Walmart)
The cups came from Party City and were alternating between light blue and purple. Okay, now that you've seen the lovely, colorful display I set up, I suppose it's time for some of the fabulous recipes that were prepared. Let's start with the Pulled Pork--

MommyBee's Pulled Pork
 - First you'll need a good hunk of pork~ about a pound and a half, maybe two pounds~ it can be pork butt, pork roast, pork loin, whatever you have on hand
- After you get you're meat, you'll want to coat it nice and thick in seasoned salt~ I use Lawry's but you can use whatever you have
- Then, after it's coated, throw it in the crock pot
- Now, Dump a half a bottle of BBQ sauce on top of it
- Here's the kicker~~~ pour an entire can of Dr. Pepper on top of that (that's right, Dr. Pepper)(I know it sounds weird and freaky, but you have to trust me--- Dr. Pepper)(Just do it!!!!!!!!)
- Now, once you've gotten over your immense fear of using soda on your pork, kick up the crock pot to high for four hours
- After four hours has passed, take two forks, stick 'em in the meat and start shredding
- Throw the rest of the BBQ sauce on top of the now shredded pork and let it cook for about one more hour
- After the last agonizing hour has passed, you can finally make yourself a sandwich (don't forget to share)
- Last, but not least, I think you owe me an apology for calling me a weirdo when you realized that I used Dr. Pepper in my Pulled Pork ;)

Okie Dokie, so unfortunatelly I don't have  a picture to post of this amazing Pulled Pork, it's just that everyone ate it so fast, it was all gone before I could grab my camera. Trust me, you're family will devour it before you can take a picture to!! Alrighty--- now, I suppose it's time for my Oh-So-Beautiful-&-Bright Deviled Eggs tutorial. So heeeerrrrreeee we go!

Oh-So-Bright-&-Beautiful Deviled Eggs
- First things first, you'll need to boil your eggs (about 10-12 minutes is good for a hard boiled egg)
- Once their all boiled, you'll need to shell them and then cut them in half lengh-wise
- Now, you need to pop out the yolks and set them aside in a baggie or a bowl
- Once all the eggs are yolk-less it's time to start setting up the dye
- You'll want to get as many bowls as you have colors
- Now, fill the bowls with enough water that will cover the entire egg white
- Place between 15-20 drops of food coloring in each of the bowls
  - Now all you have to do is throw the egg white halves in each of the bowls and wait
- Depending on how brightly you want the egg white's colored you may have to wait for more than an hour (My reds and blues were done in about an hour and my green and purple took about an hour and a half)
Here they are before I added the filling
- Now all that's left is to make the filling~ you just mix the yolks with mustard, mayo, and relish if you want
The flash kinda screwed up the picture ^^^ but there you go, the finished product (I know, I'm so cool :) Well that's about it for now---- I'll be posting more party details later (we still have the cake and games to go over!!) Bye Bye for now!
xoxoMommyBeexoxo

Monday, May 21, 2012

Sweet Shoppe Party Candy Buffet!!

Hey everyone! MommyBee here!Long time, no see--- I've been super busy planning M and A's birthday party. It turned out sooooooo cute! I'm sure you all want details, so here they are:
Lets start with decorations~
Obviously the Candy Buffet was the main attraction

Here are some more pictures of the totally awesome Candy Buffet


We had LaffyTaffys, Ring Pops, Jelly Beans, Starbursts, Smarties, Saltwater Taffy, Pixie Sticks, Old fashioned Candy Dots, Nick N' Lips, Twizzlers, Gumballs, and some really cute Old Fashioned Swirly Pops that I got in bulk for a really reasonable price here. Most of the glass jars I either already had, borrowed from friends and family, or bought for super cheap at the Goodwill. I also put toothbrushes on the buffet (I've gotten so much grief over this, but come on, I'm loading these kids full of candy, the least I can do is promote good dental hygiene). But I did make them 'candy-themed' --- well, see for yourself...

In case you can't see, the tag says 'For Your Sweet Tooth' (brilliant, I know:) ~ We also had Pink and Orange baggies for the kiddos to fill up with sweets before they left. Next to the baggies was a sign that said "Grab a Bag & Take Some Treats ~ Enjoy the Sugar because Life is SWEET!!!" Here's a pic of the sign on the table,
Super cute right??!! I know, I know, I'm awesome :) Hahaha, well that's about all the details On the buffet I suppose-- If I didn't cover something feel free to ask :) More party details to come later <3
xoxoMommyBeexoxo

Thursday, April 26, 2012

~Chicken N Dumplings in the Spring~

Hey everyone! MommyBee here (who else?) Anyways, as you've probably noticed, it's been quite a while since my last post. And that's because I've been super-duper busy! With G having been out of town it's been pretty hectic---- M had a dentist appt (that's a whole other matter), I had to get my car in the shop to get it fixed from when that girl backed into me (another matter), had to visit the periodontist for a consult, M started a new dance class (now she's doing Acro, Ballet, and Tap), had to go check out A's new school, plus all the usual housework, school, bills, etc. Needless to say, I haven't had much time to even think about blogging. With that being said, here I am (finally) ---- And yes, G is back! (finally) So let's get to heart of the matter here. Yesterday G had all four of his wisdom teeth pulled out :o! I know, I know - yes, he's all right (taking it a lot better than I expected in fact) Anywho, for those of you that have went through this awful procedure, you know it's nearly impossible to eat anything in the few days following the extractions. Only soft foods are tolerable. It is because of this that tonight, I made Chicken N Dumplings in the Spring. For those of you that don't know --- I am a soup/stew NUT! In the winter time I could stay in my PJ's on the couch with a good book (or a good TV show) and eat nothing but soup all winter long. I love it! I love the simplicity, I love that you can throw practically whatever you want in it, I love that you can throw it all in a pot in the moring and not worry about it until dinner time, I love soup (what's not to love?) So anyway, back to the point, Chicken N Dumpling in the Spring time. Now obviously, with the kids, school, housework, running, and an incompacitated G, it goes without saying that these were no ordinary Chicken N Dumplings ---- No, these were Cheating Chicken N Dumplings. Let me explain, Cheating Chicken N Dumplings taste exactly like the Non-Cheating Chicken N Dumplings only they take about a third of the time to cook as regular Chicken N Dumplings. So, being the lovely person that I am, I am going to share with you how to Cheat your own Chicken N Dumplings (for when your too busy to make the real ones). Here goes...

Cheating Chicken N Dumplings
You will need:
-1 Stick Butter
-1 Tablespoon Garlic (minced)
-2 large cans Chicken Broth (49.5oz each)
-1 already cooked Rotisserie Chicken (mine weighed about 2lbs)
-1 Tablespoon Oregano
-1 Tablespoon Basil
-1/2 Tablespoon Garlic Powder
-1/2 Tablespoon Garlic Salt
-2 Cans Cream of Chicken Soup
-1 Box Jiffy Baking Mix
-2/3 Cup Milk

(In the Picture we are missing the Milk and Cream of Chicken Soup)


Now, in a large pot, melt the butter over medium heat. Once the butter has melted, add in the minced garlic (you can use more than a tablespoon if you prefer). Saute the garlic for about 1 minute or until it is nice and tender. Then, add in both the cans of chicken broth and the cans of cream of chicken soup. Stir. Once those are mixed, you can add all of the spices (oregano, basil, garlic powder, and garlic salt). Place the lid on the pot and simmer. Now it's time to attack the bird. Get all of the meat off the bird that you can (white and dark). ~For extra flavor I usually throw in the leg bones and the larger peices of skin into the pot with the broth (don't worry we'll get all of it out before we even add the dumplings) ~ As you pull the meat off the bones, you don't need to chop it with a knife, just use your fingers, but shred it as best you can (it doesn't have to be perfect).


Once you have all the chicken shredded, you can set it aside and start on the dumplings. Now, I like the Jiffy mix, but you can certainly use whatever mix you prefer. The recipe on the back of the box makes 'drop dumplings'. Now, if your anything like me or G, we don't really care to much for drop dumplings (it's just something about the little balls of gooey dough that doesn't sit well with us) Soooooo, I have created a solution. Make the dumplings as the box directs, but instead of just balling up the dough and dropping it into the boiling broth.... roll it out (genius right?) Now, it can get a bit tricky because the dough is really sticky (ha). So all you need to do is have a couple of cups of flour on hand. Sprinkle some flour over the counter top and dump out the dough. You'll need to pretty much coat the ball of dough with flour (and maybe your rolling pin to) because otherwise, when you try to roll it out, all of the dough will stick to your rolling pin. You want to roll the dough thin, but not tooooo thin (if it's to thin, the dumplings will get soggy instead of firm). You want them about 1/8 of an inch thick. Then, when your ready, cut the dumplings into neat little squares with your pizza cutter (who'd of thunk it?)


Now, your practically finished! First, you need to fish out the bones and peices of skin out of the broth. This is best done with a small, hand held strainer (like this one from OXO) or a slotted spoon. Once you've fished all the yucky stuff out, your free to dump in the chicken that you shredded earlier. At this point, you're going to want to bring your broth to a boil. Once it's boiling, you can add the dumplings one at a time. G took this picture of me unexpectantly dropping in the dumplings to our soup ...


Once all the dumplings are in, turn the soup down to low or simmer, cover, and let them cook for about 8-10 minutes (you don't cook these as long as drop dumplings). ~The dumplings are done when some of them begin to settle down to the bottom instead of floating on top of the broth.~ And then, VOILA ~~~~~ You have cheated your way through Chicken N Dumplings!


Looks yummy right?! Well, it is yummy! And the best part is, what once would've taken you an entire day to cook, only takes about an hour! (your welcome) ;) Well, I suppose that's about it for now, take care fellow bloggers!!
xoxoMommyBeexoxo

Thursday, April 19, 2012

Getting Ready for the Party

Hey there everyone! It's me ~ MommyBee! So I'm really very excited to share with you all the details of M and A's birthday party this year! M and A were born 2 years and 2 weeks apart so what we usually do is just throw them one huge bash sometime in-between their actual birthdays ---- This saves on money (sometimes) and on time (because I can concentrate all of my time on one party instead of two). So this year we've decided to do a (drum roll please) 'SWEET SHOPPE PARTY!' Yay! I think I'm more excited than the girls :) If you haven't caught on yet, I'm a total nun when it comes to party planning. I LOVE PARTY PLANNING! (and I'm pretty good at to~ if I do say so myself) So, let's see, first things first are the invitations --- The invitations are important because they are the first things your guests are gonna see regarding your party. They have to reflect what exactly your party is going to be like & they have to get your guests excited about coming to (soooo, sorry Hallmark, but those square/rectangle, pastel, boring, comes in a pack of 10, invitations are out) This is what I did for our Sweet Shoppe Party~~~~

 Aren't they fun??!!! Yes, they were a pain in the butt to make- but their cute-ness makes up for it :) Basically all I did was cut circles out of that fun, stripey, scrapbooking paper, printed out the actual invitaion from Word, then cut that into a smaller circle, glued the two circles together, glued one of those skinny popcicle sticks to the back and put a bow on the front and voila~ super adorable, handmade, lollipop invitations (I have to admit, the idea isn't entirely original- I owe much of it to The TomKat Studio) Oh, and here's what the invitaion says:
Lollipop, Lollipop
Oh, Lolli Lolli Lolli Lollipop!

Cupcakes, Lollipops, and Gumdrops Galore
What A Sweet Celebration We Have In Store!
Please Join Us As Our Two Little Sweeties Turn 3 and 5
M and A's Sweet Shoppe
Will Be Opening On (Date)
at (Time)
(Address)
~Be a sweetie and RSVP~
Cute right? Well--- I'm happy with them (if you can't already tell) Anyways, that's about it for now I suppose--- more party details in the future :)
xoxoMommyBeexoxo


Tuesday, April 17, 2012

Hello, My Name Is....

Hi everyone, MommyBee here! As you all can probably see, I'm fairly new to the blogging world. But I'm super excited to get started! Well, as you know, I'm MommyBee :) My Husband, G, is in my profile picture with me. We live in a small little town in Illinois, about 20 minutes from downtown St. Louis. We have two beautiful little girls, M and A. M is almost 5 and A is almost 3 (birthday blogs soon to come) M is our little drama queen. She loves to be the center of attention (as most 4 year olds do). A is a little more laid back (like her father). She has a great personality. Another thing about A--- she was born with a brain malformation called Polymicrogyria (PMG for short). We don't know what caused it, but because of this A is an epileptic, she is cortically blind, and she is severely delayed (more talk about A in the future). In addition to myself, G, M, and A we also have 3 (yes 3) dogs. Denali is our 2 yr old Rotweiler (G's dog), Porscha is our 2 yr old Dobby (M's dog), and Molly, a 6 month old Pomeranian (Mollys my baby). Well, I think we have the family all covered. In addition to being a full time mom and wife, I'm also a student. Yep, I go to school full time-- right now I'm pursuing a degree in Counseling Studies (the goal here is to become a licensed psychotherapist, maybe with an emphasis in teaching). In the meantime G makes all the bucks. G works for a fireproofing company and has to go out of town a lot for his job :(in fact, he's out of the state right now for about 2 whole weeks): G's also in school, he just decided to go back (yay!) and get his degree in Criminal Justice--- I couldn't be more proud. Well, I guess that's about it for now ---- kids are begging for dinner (Chicken Florentine Bowtie Pasta Bake --- Yum!)- recipe coming soon! :)
xoxo MommyBee